Friday, November 24, 2017

Fresh cranberries and wine vinegar give this
a distinctively tangy taste
Sweet and Sour Cranberries

Thanksgiving is over, and many refrigerators across the US are filled with leftover turkey, duck, venison or ham. Yes, that means there will be sandwiches and casseroles galore for the next few weeks - until the Christmas feast takes place.

Turkey sandwiches can be dry and a little lackluster, but this cranberry condiment will liven up even the tamest turkey. It also tastes terrific with ham, duck, chicken, venison or pork tenderloin. And it's versatile enough to use as a glaze for the next poultry roast.

This starts with fresh cranberries, which are readily available at this time of year in the produce aisle of most grocery stores. The final product is a very thick jel, which stays nicely put on a sandwich.

The original recipe called for pureeing and then straining the cooked cranberry mixture. The texture was to resemble that of tomato catsup. I personally like the texture of the whole berries, and choose not to go through the additional steps of pureeing and straining.

Sweet and Sour Cranberries
1 lb (2 cups) fresh cranberries
3/4 c. red wine vinegar
1 c. light brown sugar, packed
4 cinnamon sticks
2 whole nutmegs
1 tbsp. allspice berries

In a large saucepan, gently warm the wine vinegar to a simmer. Place cinnamon sticks, nutmegs and allspice into a small cheesecloth bag tied off at the top. Steep the spice bag in the warm vinegar for at least an hour.

Remove spice bag from vinegar, add brown sugar and cranberries, and return mixture to medium heat. Stir until sugar is dissolved and cranberries begin to pop. Continue cooking until mixture begins to thicken, about 10-15 minutes.

Pour into a heat-safe container and allow to cool at room temperature. Cover and refrigerate.

Saturday, November 18, 2017

Pumpkin Rum Pie With Vanilla Wafer Crust

Pumpkin Rum Pie With Vanilla Wafer Crust

The holiday season kicks off officially with the Thanksgiving celebration on November 23. Pumpkin pie is one of the traditional desserts, but too often, pumpkin pie tastes like it should be a side dish instead of a dessert.

Pumpkin has a distinct flavor, but it is mild. It needs some embellishment and enhancement in order to make a standout dessert. This pie recipe gives it a much needed kick, and it also avoids dealing with making, rolling and shaping a traditional pie crust.

The secret ingredient is rum - or bourbon, if you prefer. Both of these alcoholic beverages complement the flavor of pumpkin. In addition, because the alcohol bakes out of the filling, it leaves the filling firm. The vanilla wafer crust is also much easier to make than a traditional pie crust, and the slight vanilla flavor also helps to pump up the pie's flavor.

This recipe makes a lot of filling, so if you have a deep dish pie pan, use it. You can also substitute a 10" tart pan and double the ingredients.

Pumpkin Rum Pie with Vanilla Wafer Crust

Crust:
2 cups vanilla wafer crumbs
1/3 c. melted butter

Filling:
2 c. canned pumpkin (do not use canned pumpkin pie filling)
1 can (12 oz) sweetened condensed milk
2 tsp. ground cinnamon
1/2 tsp. ground nutmeg
1/2 tsp. ground ginger
1/4 tsp. ground cloves
dash salt
1/4 c. dark rum or bourbon
2 large eggs
Chill the crumb crust before baking to
prevent it from falling apart when pie is served


To make crust:
Using a food processor, pulse enough vanilla wafer cookies to make 2 cups of fine crumbs. Place crumbs in medium mixing bowl.

Melt 1/3 c. butter. Pour melted butter into crumbs, and use a fork to stir and coat crumbs with butter.

Spray a 9" pie pan with nonstick cooking spray. Line the plate with crumb mixture, using a wooden spoon to press crumbs evenly along the bottom and sides of the pie pan. Chill crust for an hour in the refrigerator.

Preheat oven to 375 degrees. Place chilled crust into preheated oven and bake for 8 to 10 minutes. Crust will be slightly brown. Do not overbake. Allow to cool before adding filling.

To make filling:
In a large mixing bowl, whisk together pumpkin, sweetened condensed milk, rum, eggs, salt and spices. This will be a thick liquid. Gently pour into prepared crust.

Preheat oven to 425 degrees. Bake pie for 15 minutes, then reduce oven temperature to 350 degrees. Bake an additional 30-40 minutes or until a knife inserted 1" from the crust comes out clean.

Allow to cool completely before serving. Cover and refrigerate any leftover pie.

Ablewise.com Free Classifieds - Post your free photo Ads in 10 Countries around the world!

Wednesday, November 1, 2017

Blueberry Pound Cake

Frozen blueberries, sour cream and real butter
add body and flavor to this pound cake.

Blueberry Pound Cake


Pound cake of any kind is a favorite of mine. Rich, moist and essentially foolproof, poundcake doesn't require special flour, sifting or a lot of fussy preparation. The typical poundcake is baked in either a standard loaf pan or a Bundt pan. It doesn't need frosting, and it can be used as a breakfast bread or as a dessert.

This particular recipe contains sour cream and frozen blueberries. It tastes a lot like a blueberry pancake in loaf form. It is made for noshing with tea or a fresh cup of hot dark roast coffee.

Blueberry Pound Cake
3/4 c. butter (no substitutes)
1 1/2 c. granulated sugar
3 eggs
1 1/2 tsp. vanilla extract
3 c. all purpose flour
1 1/2 tsp. baking powder
1 1/2 tsp. baking soda
3/4 tsp. salt
1 1/2 c. sour cream
1 1/2 c. frozen blueberries

Preheat oven to 350 degrees. Grease and lightly flour 10x4 inch tube pan, Bundt pan or two 8 1/2 x 5 1/2 inch loaf pans.

Using the microwave, melt butter in a large mixing bowl. Add granulated sugar and blend on low speed until sugar is dissolved. Add the vanilla and eggs, beating until thoroughly incorporated.

Whisk together flour, baking powder, baking soda and salt in medium mixing bowl. With mixer on low speed, alternate adding flour and sour cream. When all ingredients have been added, increase mixer speed to medium and beat for 2 minutes.

Pour 1/3 of the batter into prepared pans. Top this layer with 3/4 c. frozen blueberries. Add another 1/3 of the batter, and layer with 3/4 c. blueberries. Cover with final 1/3 of batter. If desired, swirl blueberries gently throughout the batter using a knife or spatula.

Bake in preheated oven - 45 to 50 minutes for loaves, 60 - 65 minutes for tube or Bundt pan, or until cake tester comes out clean. Cool slightly in pan before removing.

NOTE: Keep the blueberries frozen for this recipe, otherwise they will stain the batter blue.

Thursday, September 21, 2017

Oatmeal Honey Cookies

Oatmeal Honey Cookies


Just in time for Rosh Hashana, a recipe that uses honey as one of its main ingredients. These oatmeal cookies are soft, mildly sweet and full of oat flavor. They capture the essence of autumn, and are a nice addition to your new year's table. There is no dairy in this recipe (butter makes the cookies much too soft) so they are fine with meat or dairy meals. Bake them with or without nuts; they are good either way.

Oatmeal Honey Cookies
1 1/2 c. all purpose flour
1 1/2 tsp. baking powder
1/2 tsp. baking soda
1/4 tsp. salt
1 tsp. cinnamon
2/3 c. vegetable shortening
1 c. packed dark brown sugar
1/3 c honey
1 tsp. vanilla extract
2 eggs
2 1/2 c. quick cooking rolled oats
(optional) 2 c. chopped pecans or walnuts

In a medium mixing bowl, whisk together the flour, baking powder, baking soda, salt and cinnamon. Set aside.

Melt the vegetable shortening in a microwave-safe bowl, and pour into the bowl of a stand mixer. Add the brown sugar, honey and vanilla. Using the hard paddle blade, mix together until sugar has dissolved into the melted shortening. Allow to stand at room temperature for about 5 minutes; the shortening will begin to firm.

Alternate addition of the dry ingredients with the eggs, beating after each addition. Fold in nuts, if desired. Cover dough with plastic wrap and chill for 30 minutes; dough will be very sticky.

Preheat oven to 350F degrees. Using a cookie scoop or tablespoon, drop dough about 2 inches apart on parchment-lined baking sheets. Bake for 10 - 12 minutes, or until the edges are lightly golden.

Immediately slide parchment onto wire cooling racks; allow to cool for 5 minutes, then slide cookies off parchment and onto cooling racks to cool completely. Makes 30 - 36 cookies, depending on the scoop size.

Sunday, August 27, 2017

Apple Carrot Bread

Apple Carrot Bread

The second wave of apples is ripening at my house. These are the heirloom variety, Pound Sweet, which live up to their name. The apples can weigh as much as a pound each, and the fruit is exceptionally juicy and sweet. The only downside is that these apples don't have that little bit of tart (malic acid) that characterizes the best eating and cooking apples.

Pound Sweet apples (and Golden Delicious, which shares a lot of the genetics) are very good for baking. They don't get mushy, and their size means that it doesn't require peeling and coring a lot of apples to have enough material for a recipe.  And since daytime temperatures have dropped from the high 80s to the mid-70s, I decided today was a good day to bake some loaves of apple carrot bread.

Is it bread, or is it cake? That's a difficult question. It doesn't require cake flour, but the texture and flavor are cake-like. It really doesn't matter, though, unless you are prejudiced against eating a piece of cake for breakfast.


NOTE: The flavoring I used in this is called Princess Cake and Cookie emulsion. This is a thick liquid that has a slightly floral flavor that combines vanilla and citrus. It can be purchased through Lorann Oils, or on Amazon.com.

Apple Carrot Bread

3 c. all purpose flour
1 tsp. baking soda
1 tsp. baking powder
1 tsp. ground cinnamon
3/4 tsp. salt
1/2 c. butter (no substitutes)
1/2 c. solid vegetable shortening
2 c. granulated sugar
1 tsp. Princess Cake and Cookie emulsion (or substitute 3/4 tsp. vanilla and 1/4 tsp. lemon extract)
3 eggs
1 c. shredded carrots
1 c. grated peeled apples

Preheat oven to 350 degrees. Prepare two 9 x 5 loaf pans with nonstick cooking spray.

In medium mixing bowl, whisk together flour, baking soda, baking powder, cinnamon and salt. Set aside.

In large microwave-safe bowl, melt butter and shortening on high. Pour into bowl of stand mixer. Add granulated sugar and Princess Cake and Cookie emulsion. Using flexible blade, cream together until sugar is dissolved in shortening.

Alternate addition of eggs, grated apples and carrots and dry ingredients on low speed. After all ingredients are folded together, increase speed to medium and beat for 2 minutes.

Pour batter evenly into 2 prepared loaf pans. Bake for 50 - 60 minutes or until cake tester comes out clean and bread begins to separate from sides of pan. Allow to cool for 10 minutes before turning out onto cooling rack.

If desired, frost with cream cheese icing or drizzle loaf with confectioner's icing. Because the fruit in the bread keeps it very moist, it is prone to molding if left at room temperature. Store in airtight container(s) in refrigerator, or freeze for future use.

Saturday, July 29, 2017

Apple Pandowdy


Dutchess of Oldenburg apples are an early ripening heirloom variety

Apple Pandowdy

I grow heirloom apples. One variety that ripens very early is the Dutchess of Oldenburg. This particular apple is the size of a crabapple, but it has the genetics of a MacIntosh. So even though it requires harvesting, peeling and coring a large number of the apples to make anything, the end result is well worth the effort.

Because the apple variety is several hundred years old, I decided that it was best used in a traditional American recipe, using traditional American tools. Apple pandowdy baked in a cast iron skillet was the logical - and tasty - conclusion.

What is a pandowdy? It's basically a one-crust pie. The filling is heaped into the skillet, and pie pastry is latticed over the top. When the pandowdy is scooped out, the flaky crust mixes into the filling, absorbing all of the spicy and fragrant juice. Because apples are high in pectin, you don't need to add any thickening agents such as corn starch or Clear-Gel. However, if you like a really firm filling, you are free to do so.

You don't need a cast iron skillet for this recipe. If you have a traditional casserole dish (or if you sprang for one of those Copper Chef square pans) you can use these deep dishes to make your pandowdy. The beauty of cast iron is that it distributes heat evenly so your filling and crust aren't overbaked in one area and undercooked in another.

Pandowdy baked in a cast iron skillet
Pastry:

1 c. all purpose flour
1/2 tsp. salt
6 tbsp. vegetable shortening
2 - 3 tbsp. ice water

Filling:

1 gallon (8 cups) apple slices
3/4 c. light brown sugar
1 tbsp. lemon juice
1/2 tsp. salt
2 tsp. cinnamon
1/2 tsp. allspice
1/2 tsp. nutmeg
1/4 tsp. ground cloves

To make pastry: whisk together flour and salt. Using a pastry blender, add shortening one tablespoon at a time, cutting in thoroughly until mixture resembles small pebbles. Add ice water, one tablespoon at a time, and blend until dough holds together. Remove pastry from bowl, shape into a ball and flatten into a disc. Wrap in plastic wrap and chill for at least one hour before rolling out.

While your pastry chills, prepare the apple filling. Place sliced apples in large bowl and add lemon juice. In small bowl, mix together brown sugar, spices and salt. Add to apples; use a wooden spoon to stir and coat apples with sugar, spices and lemon juice.

Preheat oven to 425 degrees. Spray a deep casserole dish or a seasoned cast iron skillet with nonstick spray. Add apples to skillet; heap excess in the middle to avoid having the filling spill over the edges.

Remove pastry from refrigerator, unwrap, place on lightly floured surface and roll out to 1/8" thick. Cut into strips 1/2" wide; create a lattice over the top of the filling.

Bake the pandowdy for 35 to 40 minutes or until crust is a golden brown.


Saturday, July 1, 2017

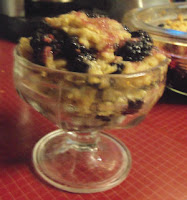
It's The Berries! Black Raspberry Crisp


Thanks to the unusually warm winter we had, my raspberry crop was a solid 2 weeks early. I grow two varieties: Fall Gold, which offers a small crop each summer followed by giant crop in September, and Bristol. Bristol is by far the better berry for cooking. This dark purple berry is sweet with a hint of tartness, holds its shape very well and each bush provides at least two quarts of berries. Luckily, these berries also freeze well, so I used part of the crop right away and bagged the rest.

Raspberry crisp a luscious fruit dessert that is incredibly simple to make. In addition, because the fruit provides most of the sweetness, it uses very little sugar. In fact, this recipe lends itself well to sugar substitutes such as Truvia.

I recommend using real butter to make the crisp topping. Butter adds a toasty flavor to the crust, which contains oatmeal. It also helps the crisp to bake to a beautiful golden brown. You'll want to use a pastry cutter to incorporate the butter with the dry ingredients. Cutting in the shortening coats the flour and oats without activating the gluten. The end result is a crunchy crisp streusel topping.


Raspberry Crisp
2 quarts fresh raspberries
1/4 c. granulated sugar or sugar substitute for baking
1 tbsp. corn starch
1 tbsp. lemon juice

Mix together 1/4 c. sugar and corn starch. Gently coat berries with the sugar and starch mixture.  Spray a 2 quart casserole pan with nonstick cooking spray and fill with berry mixture. Drizzle with lemon juice. Allow to rest at room temperature while preparing the topping.

Topping
1/2 c. all purpose flour
1/2 c. quick cooking oats
1/4 c. brown sugar
1/4 c. granulated sugar or sugar substitute for baking
1/2 tsp. nutmeg
1/4 tsp. allspice
1/4 tsp. cardamom
1/2 c. butter, at room temperature

Whisk together the flour, oats, sugars and spices. Using a pastry blender, cut in the butter, one tablespoon at a time, until the mixture resembles coarse crumbs.

Preheat oven to 350 degrees. Generously cover the berry mixture with the topping. Bake uncovered for 30 minutes or until topping is lightly browned.  Allow to cool before serving; this allows the berry juices to thicken slightly. Serves 6 to 8.